Table of Contents
I’ve got for you the best pulled pork recipe that’s not only delicious, but it’s also easy and everyone that you make it for will rave over it! This is the perfect recipe to cook on the Masterbuilt gravity smoker, however this recipe is versatile enough to be used on any cooker!
Whether you’re new to BBQ, or consider yourself a backyard pitmaster, this pulled pork recipe is going to be everything you’re hoping for. Tender, juicy & flavorful pulled pork recipe that will be your new go-to.
Click Here to Print This Recipe
From prep to plate, I’ll walk you through each step so you can confidently make the best smoked pulled pork recipe on your Masterbuilt smoker. Note: on the Masterbuilt Gravity Series smoker you can either use charcoal briquettes or lump charcoal.
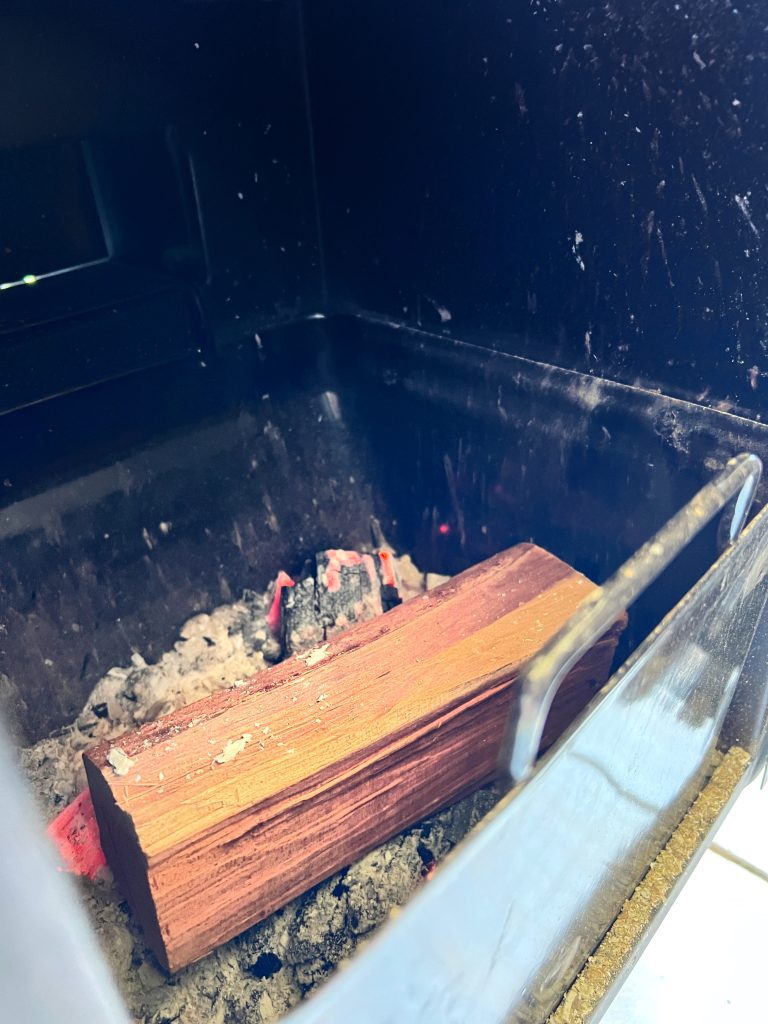
I prefer to use lump charcoal for its lack of additives and fillers. Lump charcoal is simply wood that's been kiln dried so the flavor that comes from it is amazing!
Let’s Prep:
First thing we'll do is to to fire up the Masterbuilt smoker. I use the Masterbuilt gravity series, which makes controlling the smoker temperature super easy. For this pulled pork recipe, preheat your smoker to 225°F. This low heat will ensure that the pork cooks slowly and evenly, allowing the fat and connective tissues to break down and create that tender, fall-apart texture we all love in a pulled pork recipe.
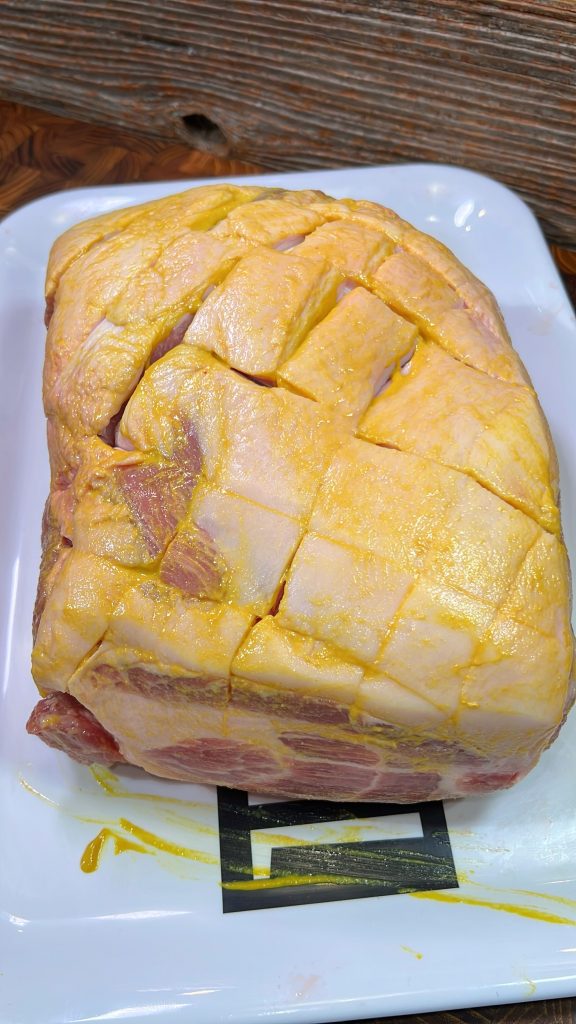
As with all of my recipes, I always emphasize putting a little additional time into the prep work to make sure your cook goes smoothly. Nothing changes for this pulled pork recipe. The piece of pork that we’re cooking is the Boston butt aka pork shoulder or picnic roast. It’s not the pig’s butt.
This meat has a high fat content which will make your meat juicier than even expected and extra tender when cooked low and slow and according to this pulled pork recipe. Grab your pork shoulder, and let’s get started!
Click Here to Print This Recipe
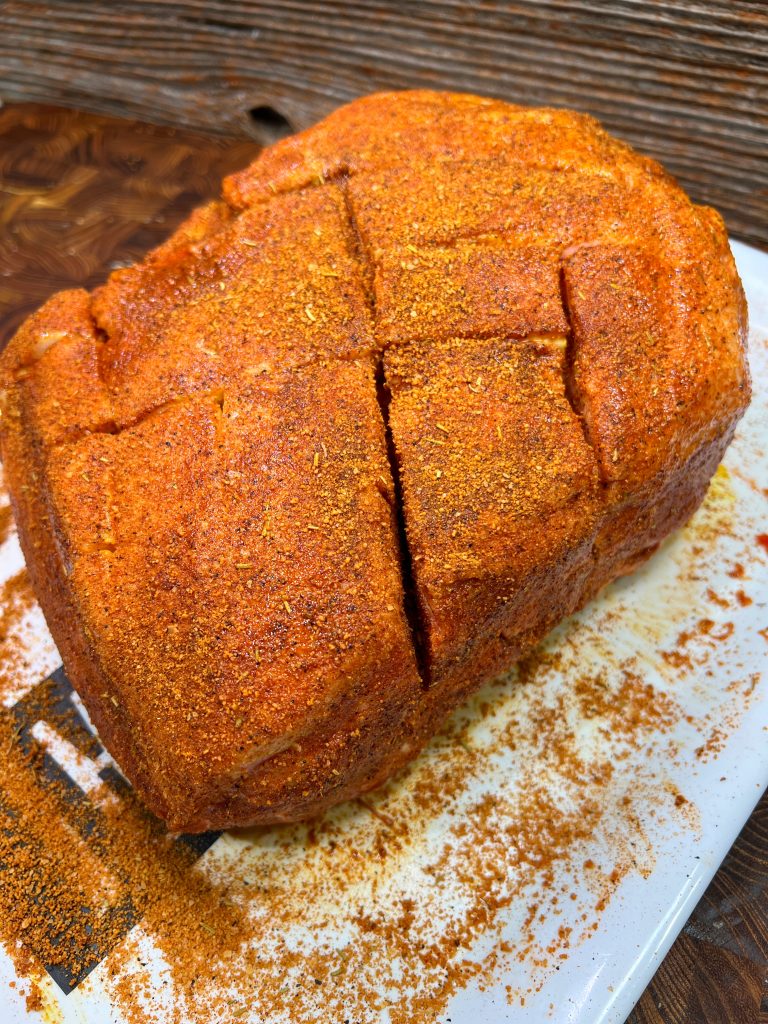
When applying the rub, make sure every inch of the pork is covered. Pat the seasoning into the meat, but don’t rub it in. Rubbing the spices can cause the seasoning to clump and create uneven spots on the pork. Just pat it in gently, and you’re good to go.
Once your pork is prepped, let it sit at room temperature for a little bit, about 30 minutes should do just fine while the smoker is heating up. This will allow the rub to really adhere to the meat and start breaking down some of the fat. If you have the time, you can also let it rest in the fridge overnight for even better flavor. But trust me, even with just a short rest, this pulled pork recipe is going to knock your socks off.
Let’s Cook:
Pulled Pork recipe coming along nicely!
While your smoker is heating up, grab an aluminum pan and put it in the smoker below where the pork will cook. This will come in handy later as well. You could also use this as a water pan, however, this smoker holds so much moisture, so I don't have to worry about it. I like to use cherry or apple wood chips or chunks when smoking pork.
Either of the wood gives the meat a sweet, subtle smoke flavor that complements the richness of the pork. If you don’t have apple or cherry wood, you can also use hickory. Any of them works great for this pulled pork recipe.
Once the smoker reaches 225°F, place pork fat side up on the grill. Close the smoker door and let the smoking process begin! For the first 90 minutes, just let the smoker work its magic. The fat cap will start to render, and the dry rub will form a beautiful crust, known as bark, on the outside of the pork.
Click Here to Print This Recipe
After about 90 minutes, it’s time to check on the pork. If the outside feels dry to the touch, spritz it with some apple juice. This keeps the pork moist and adds a little sweetness to the bark. If the pork isn’t dry yet, check back in 20 minutes and spritz it then. You’ll want to repeat this spritzing process every hour or so for the remainder of the cook. The apple juice spritz helps keep the outside moist without washing off the seasoning.
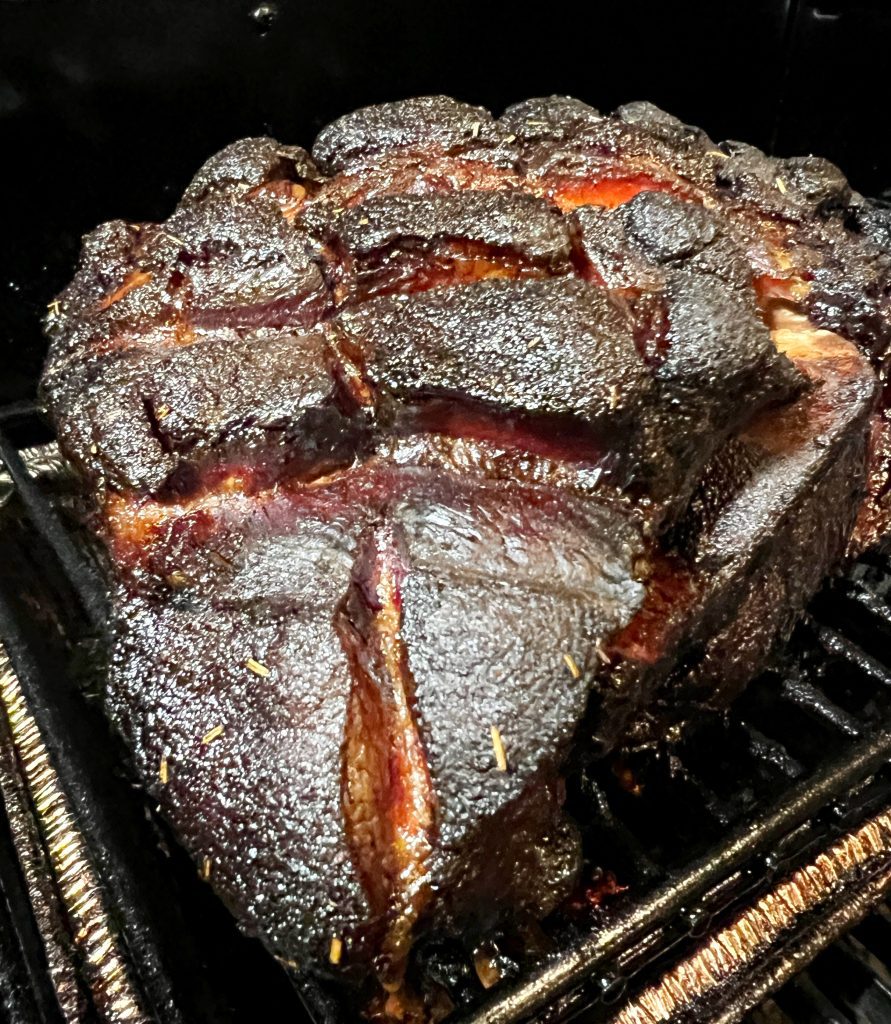
Now, here’s where things start to get exciting. When the internal temperature of the pork reaches 160°F, it’s time to raise the smoker temperature to 275°F. This will speed up the final cooking process while ensuring the pork doesn’t dry out. You can check the internal temperature with a meat thermometer that's built into the Masterbuilt smoker. You can also use a separate temperature probe that connects to your phone to keep track of the cook.
At this point, the fat cap should be fully rendered, and the bark should have a deep, rich color. When the pork's internal temp reaches 203 (the desired temperature) it's time to get ready for the next step in the cooking process.
This is the sweet spot for the pulled pork recipe—it’s when the meat becomes so tender it practically falls apart. You don’t want to rush this step. Low and slow is the traditional method for a pulled pork recipe, and patience here will deliver great results.
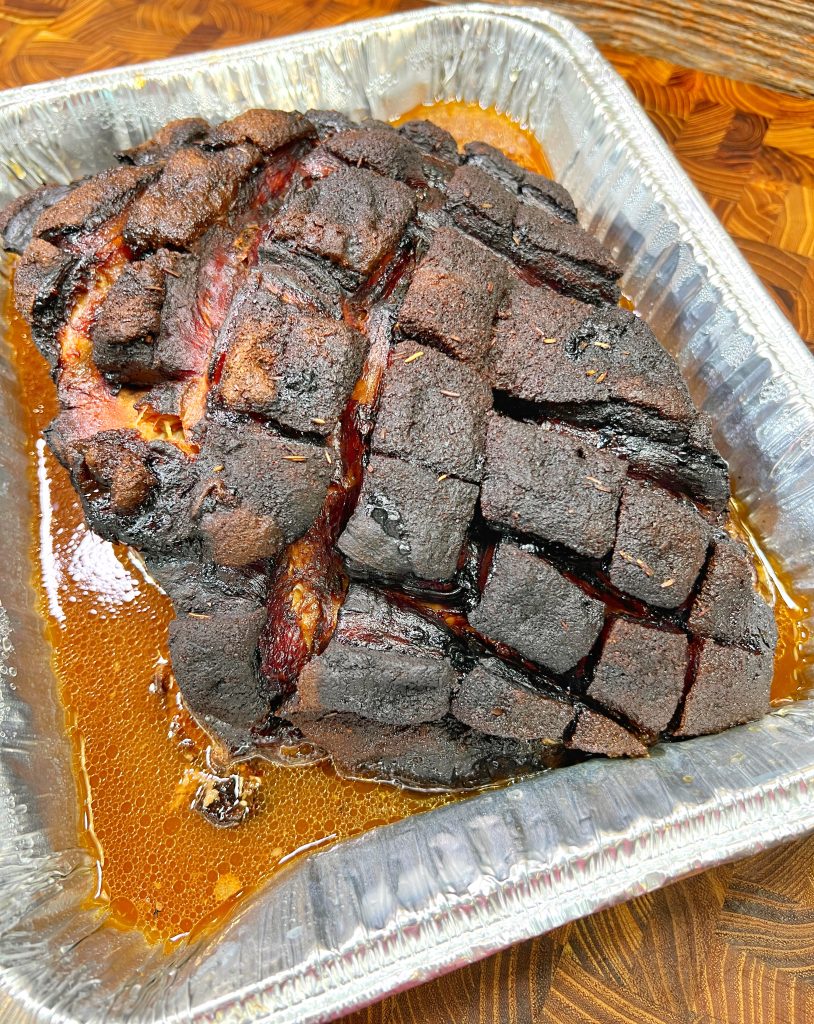
Once the pork hits 203°F, carefully remove it from the smoker and place it in the foil pan. Cover it tightly with tin foil (aluminum foil) to trap the heat and let the pork rest. And trust me, this resting process is where the magic happens.
Let’s Eat:
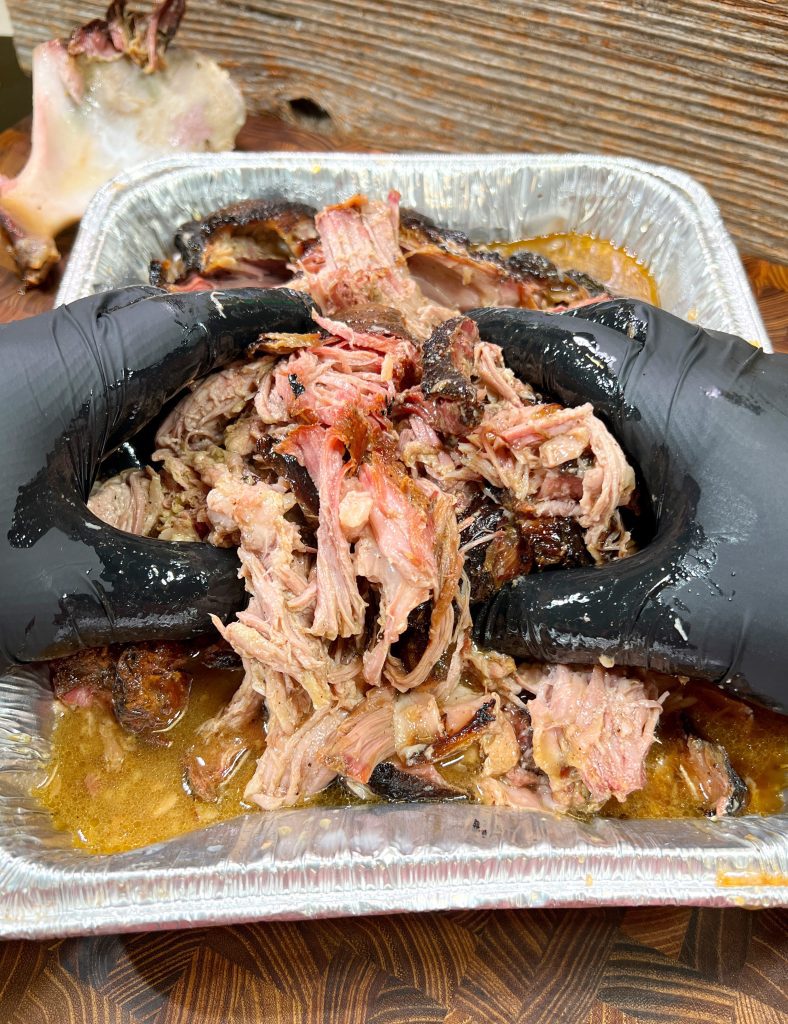
Now that your cut of meat has rested for the required amount of time let's get ready to pull the pork.
There are a few ways this can be done effectively: you could use 2 forks, a pair of "bear claws" or your hands with some insulated gloves underneath latex. This is my preferred method, if for no other reason than it doesn't get extra silverware dirty.
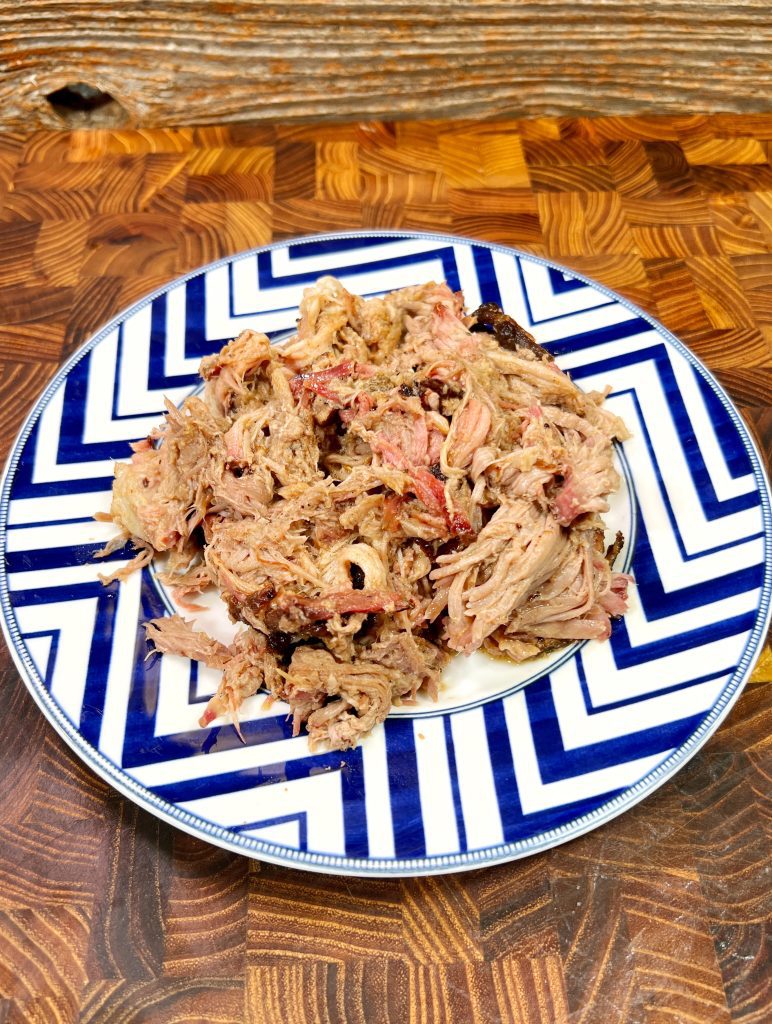
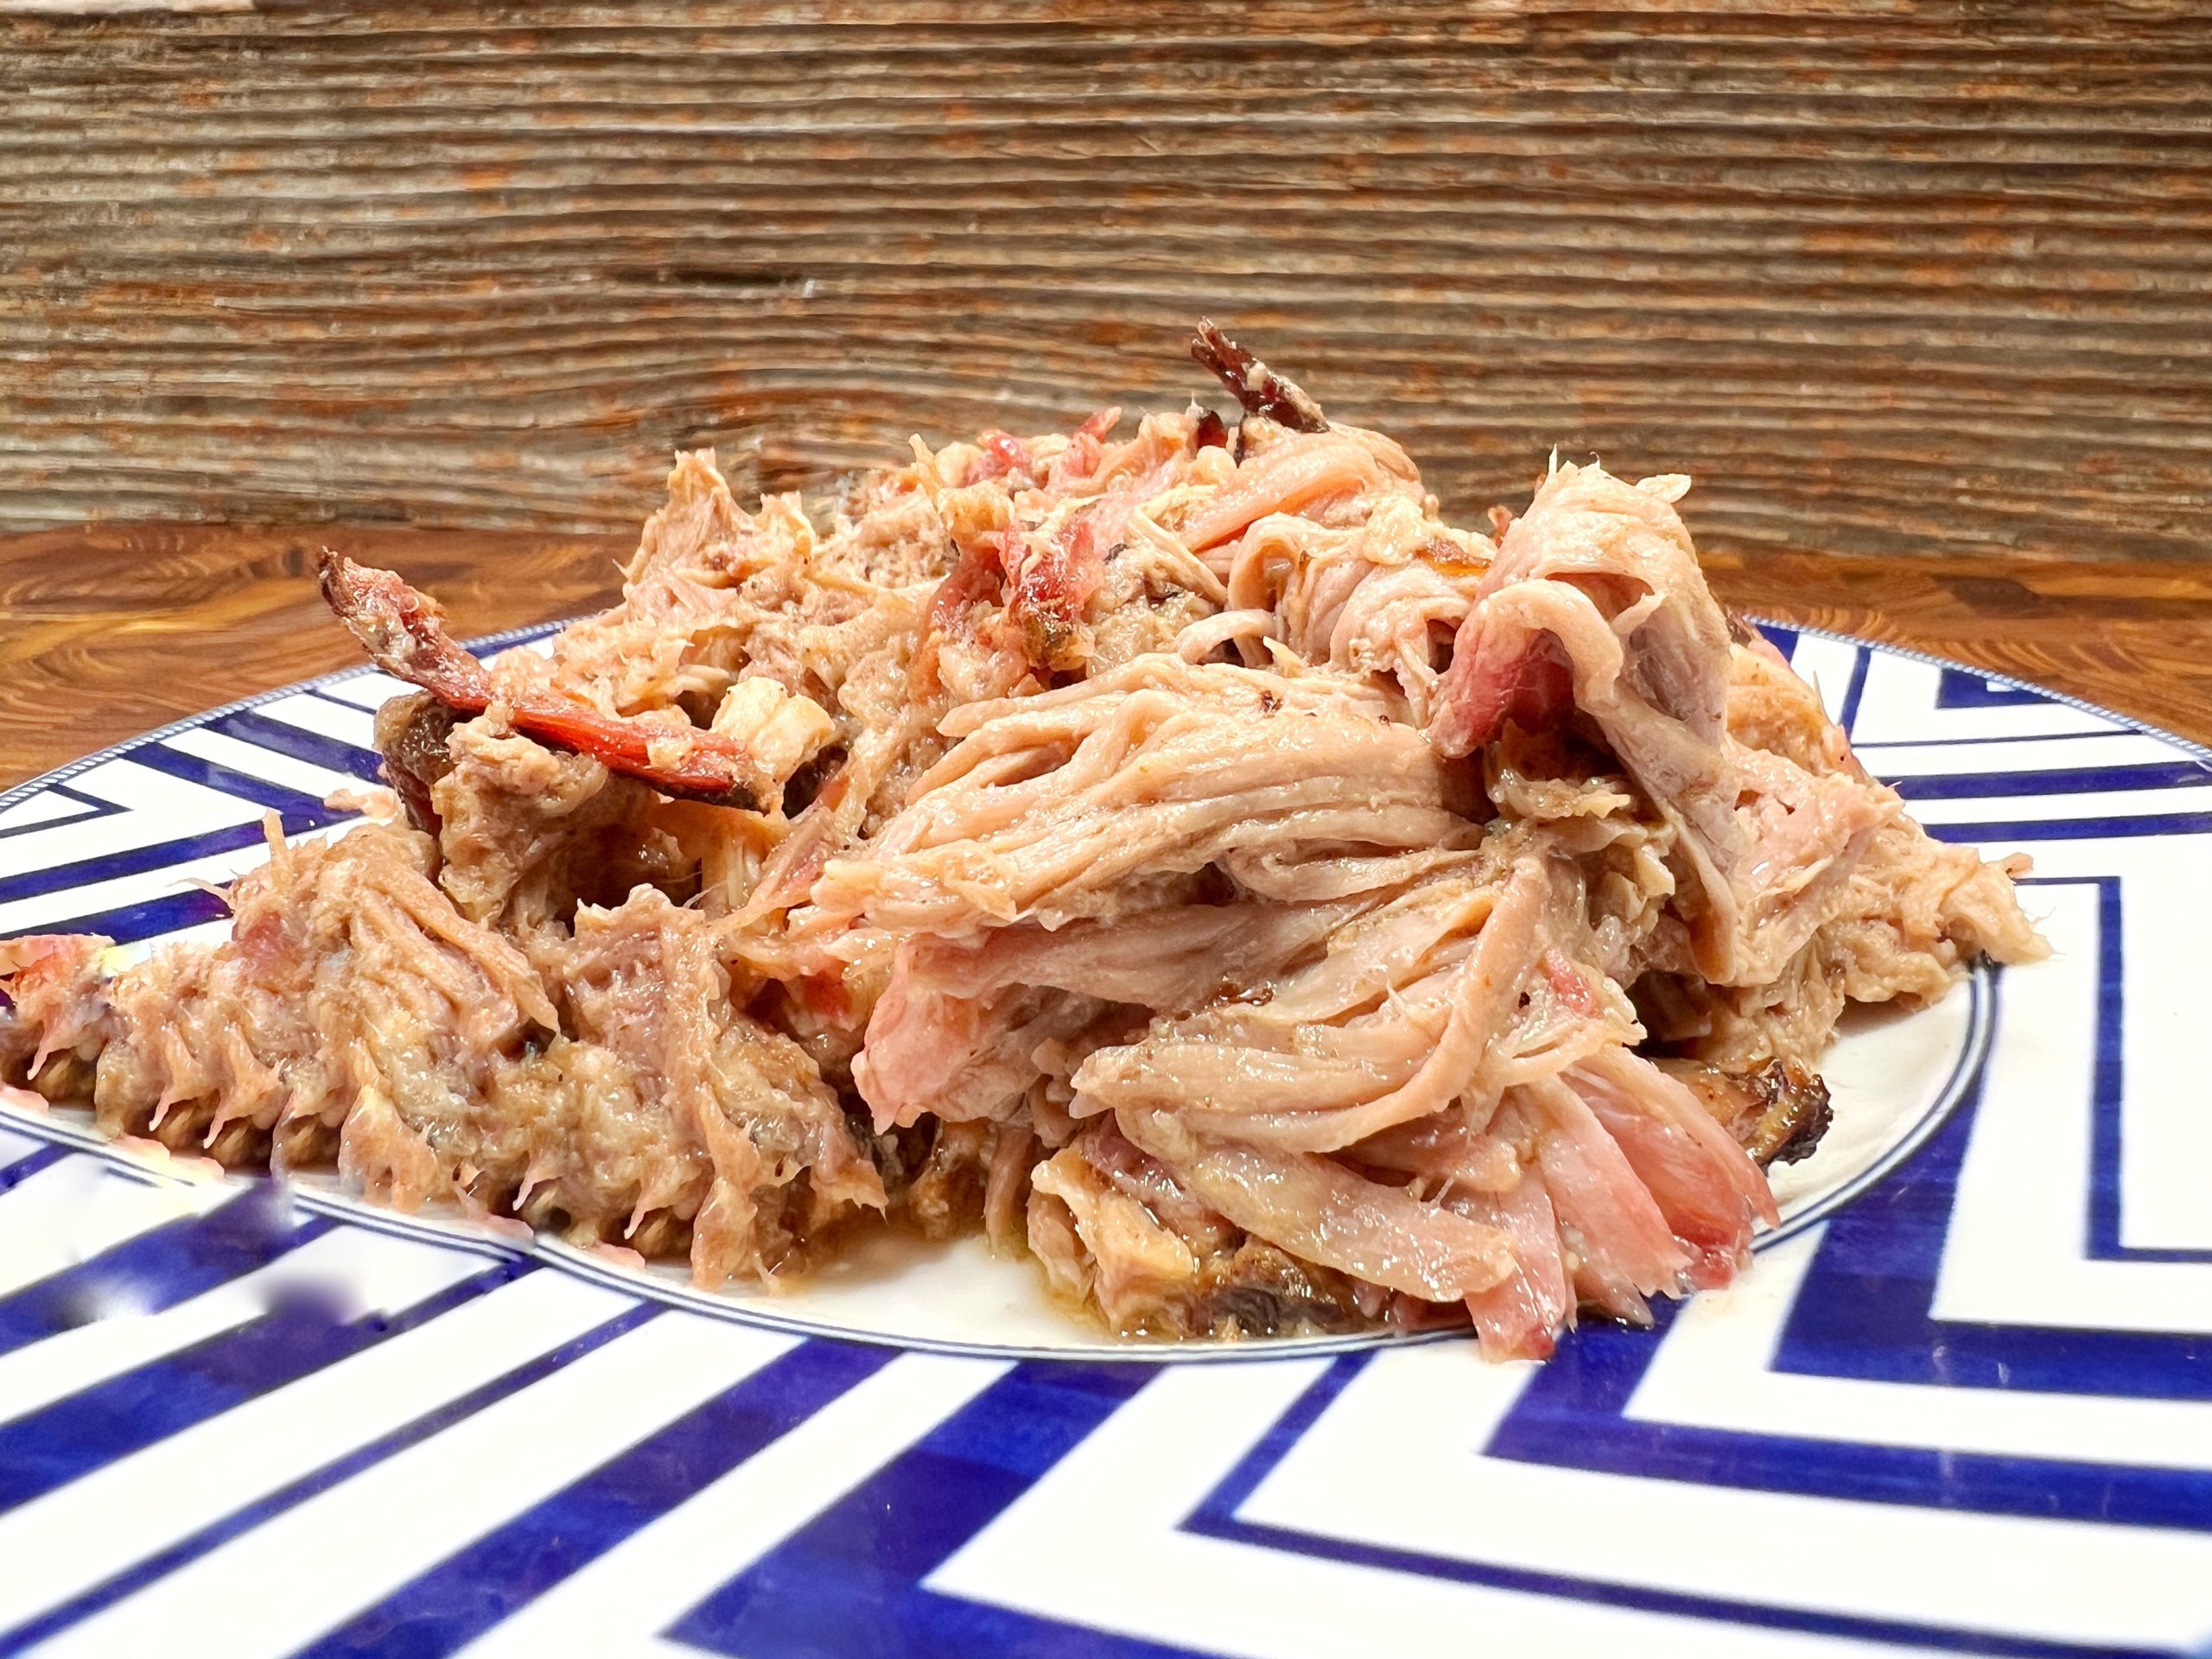
Serve this on it's own, or as pork sandwiches. Your taste buds are drooling at this point. Serve it with North Carolina style BBQ sauce which is a thinner sauce that's heavy on apple cider vinegar and spices. Your favorite BBQ sauce works great along with some crunchy coleslaw either as a side, or right on the sandwich.
Important Notes:

You can rest your pork for up to 2-3 hours, the most important part is to make sure the internal temperature of the pork doesn't drop below 145F as this is the danger zone when meat can grow bacteria. If you need to hold it longer - place it in the oven, or smoker at 165F-170F for as long as you need up to about 12 hours.
Looking for other Masterbuilt recipes? Check out my easy Tri Tip recipe cooked on the Masterbuilt.
This pulled pork recipe will yield great results. In fact, pulled pork is known as the most forgiving type of cook in BBQ because of the large amount of intra-muscular fat in the pork. It's really hard to dry it out, and will have an awesome smokey flavor every time if you just follow these basic principles.
Did you know that when you get a new smoker, the recommended first cook on it by many experts (and me) is to make pulled pork to get the feel of how the smoker is going to cook, including finding hot spots on the smoker, and how it uses its fuel during the cook? Lots of people want to jump straight to a brisket, which should be your 4th or 5th cook on a new smoker at the earliest if you're wanting to cook that.
Check out my other BBQ Recipes:
- Pulled Pork Recipe: BBQ Garlic Bread Leftovers
- Brisket Bombs – Leftover BBQ Recipe
- Smoked Pork Belly Pinwheels with Cherry Bourbon Glaze
Easy Smoked Pulled Pork Recipe on Masterbuilt Smoker
Ingredients
- 1 Boston Butt or Pork Shoulder whole
- 4 tablespoon Yellow Mustard
- 8 oz Pork BBQ Seasoning / Rub
- 24 oz Apple Juice
Instructions
- Preheat smoker at 225F
- Unwrap pork butt and remove any loose fat that may be hanging off the meat
- With the fat cap up, use a sharp knife to score the fat cap in a cross hatch pattern. This will allow both seasoning and smoke to penetrate deeper into the meat
- Apply a thin layer of yellow mustard on all sides of the pork
- Liberally season the pork with your favorite pork rub. Make sure to coat all sides of the meat until you can't see the meat any longer.
- Once applied, pat the seasoning into the meat - DON'T RUB it!
- Place pork butt on smoker
- After about 90 minutes, check on the pork, the outside should be dry to the touch- if so, spritz with apple juice, if not, check back in about 20 minutes.
- Repeat spritzing every hour or so
- When the meat hits an internal temperature of 160F, increase temp to 275F and cook until the meat hits 203F internal.
- When meat hits target temp, place in foil pan, and cover tightly with aluminum foil to rest
- Rest for a minimum of 2 hours between 4-12 hours is preferred - make sure the internal temperature of the meat doesn't drop below 150F. If holding meat your oven at 165F-170F works perfectly.
- Shred meat, and add more seasoning if desired.
- Serve hot on a sandwich or as part of a BBQ plate

Lowry says
The pulled pork tastes great!
Danny Dobrzenski says
Thank you - one of my favorite recipes
Ivan Vires says
Scoring the top is a pro move for sure.
Danny Dobrzenski says
It just simply can't be optional